Search in this section
Pre-screening by MailProxy
The MailProxy is an effective virus and spam filter, which is connected in front of a server customer system, in order to examine emails for viruses, spam and other harmful contents in advance and to process them accordingly (marking, deletion). This pre-screening can be configured in a differentiated manner and thus adapted to the specific e-mail volume.
These steps are required
- Order MailProxy in AutoDNS.
- Configure MailProxy in AutoDNS.
- Enter MX record for the MailProxy server in the zone file.
Order MailProxy
Activate in the shopping cart when ordering a domain.
When ordering a domain, the MailProxy can be added in the shopping cart. The MailProxy settings can be made now or afterwards.
→ add domain to shopping cart → activate MailProxy in Optional Services in the shopping cart → complete ordering process
Activate MailProxy retrospectively for a domain
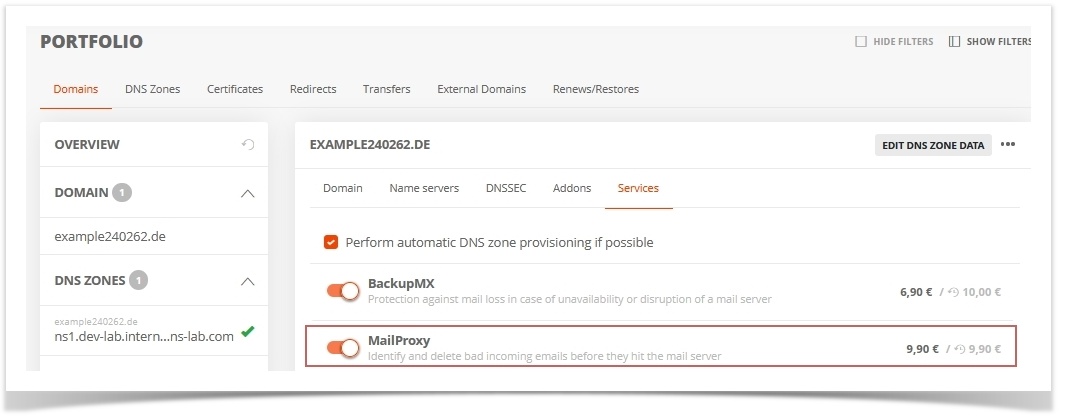
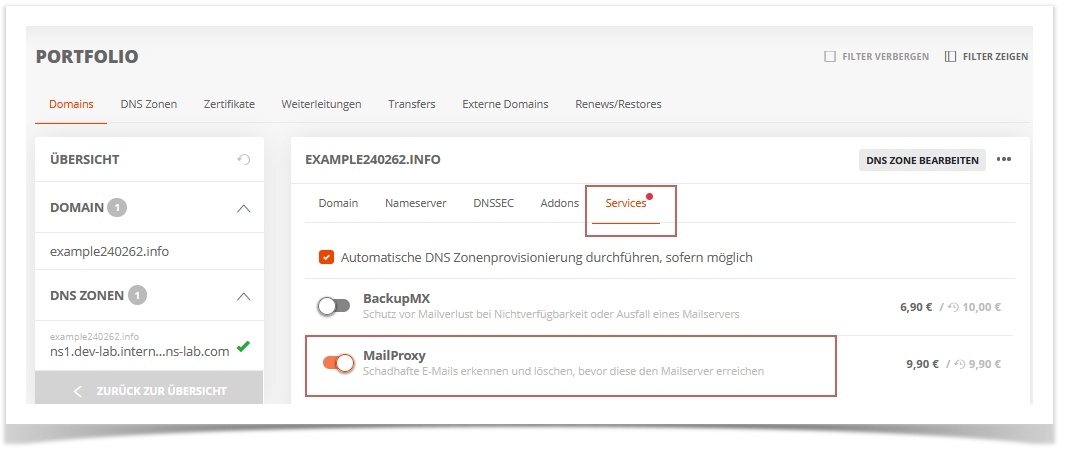
→ Portfolio → Domains →doubleclick the domain → tab Services → activate MailProxy → complete order process.
The MailProxy settings can be made now or afterwards.
Order MailProxy
To order the MailProxy function, there is a change to the AutoDNS Platform interface.
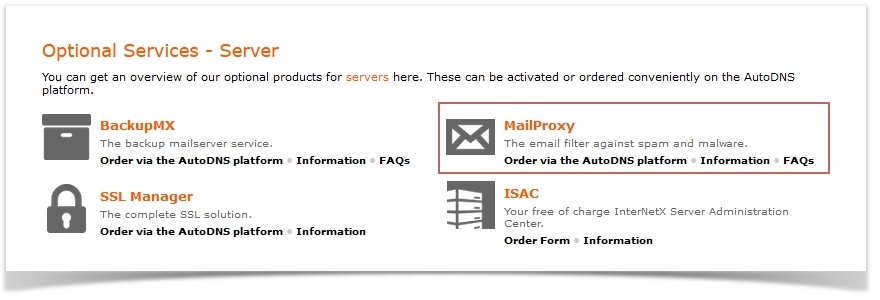
→ Customer Center → Optional Services → Optional Services - Server → MailProxy → order via AutoDNS Platform - log in to AutoDNS Platform with the same user data.
After the order, which is processed in AutoDNS Platform via the shopping cart, the MailProxy can be configured there or in AutoDNS X3.
Configure MailProxy
→ Portfolio → Domains → tab Services → MailProxy must be enabled
Redirect target (Mail- or SMTP-Server) | Mail server to which the MailProxy should forward the emails after the check. The MX record of the actual mail server must be removed from the zone. |
Quarantine email | The email address to which the daily report on quarantined emails should be sent. |
Activate greylisting | If greylisting is activated, the first email from an unknown sender is initially rejected. Emails from this sender are only accepted after a further delayed delivery attempt. Greylisting may delay the delivery of emails. |
Protection settings
Protection level | Security levels for MailProxy:
Click on Show information to display settings and values With the user defined selection, the values can be set individually. Details about the values can be found in the user interface in the ? help. |
Virus protection | When a virus is detected in an email, the infected email is attached to an email and sent to the original destination address. In the text of this email, a warning is issued to indicate the presence of the virus.
Virus protection settings: Quarantine: the filtered emails are moved to a quarantine folder. An email is sent to the administrator's specified email address every day. It informs about all emails that are in the quarantine folder. Delete: the emails are deleted. Mark: the emails are accepted, although they have been filtered out. Disabled: Disable virus protection |
File type filter | Setting for protection against blocked file types. Blocked files are file types that are known to frequently contain viruses. E.g. .scr, .jpg.exe. These file types are stored
|
Spam filter | Setting for the spam filter: Delete: the filtered out emails are not accepted. Mark: the emails are accepted even though they were filtered out. Disabled: disable protection |
Change subject | If the checkbox is activated, the email subject is marked as spam. |
Email filters
Whitelist | The email addresses whose mails should never be marked as spam. Catchall (@example.com) is allowed. |
Blacklist | The email addresses whose mails should always be marked as spam. Catchall (@example.com) is allowed. |
| Exclusion list | Email addresses that should not be checked for spam. Certain administrative address must not be checked by spam filters. An example of this are the "hostmaster" addresses, e.g. hostmaster@example.com. The quarantine email address should not be entered here. |
BackupMX and MailProxy for external domains
The BackupMX and MailProxy services are standalone products. Domain, email server and DNS records can be outside our management to use the services.
In the MailProxy Management area, the new entry can be created and set up.
→ Zones & Redirects → MailProxy Management → + New
MailProxy entries
Source Domain | One or more domains for which the MailProxy is to be set up. Separate the entries with Enter. Existing domain lists can also be loaded. |
Target Domain | Mail server to which the MailProxy should forward the emails after checking. |
Quarantine Email Address | The email address to which the daily report on quarantined emails should be sent. |
Protection Level | Security levels for MailProxy:
With the User defined selection, the values can be set individually. |
Security Settings
Activate Greylisting | If greylisting is activated, the first email from an unknown sender is initially rejected. Emails from this sender are only accepted after a further delayed delivery attempt. Greylisting may delay the delivery of emails. |
Virus Protection | When a virus is detected in an email, the infected email is attached to an email and sent to the original destination address. In the text of this email, a warning is issued to indicate the presence of the virus.
Virus protection settings: Quarantine: the filtered emails are moved to a quarantine folder. An email is sent to the administrator's specified email address every day. It informs about all emails that are in the quarantine folder. Delete: the emails are deleted. Mark: the emails are accepted, although they have been filtered out. Disabled: Disable virus protection |
File Type Filter | Settings for protection against locked file types. Locked files are file types that are known to frequently contain viruses. E.g. .scr, .jpg.exe. These file types are locked
|
Spam Filter | Setting for the spam filter: Delete: the filtered out emails are not accepted. Mark: the emails are accepted even though they were filtered out. Disabled: disable protection |
Modify Subject | If the checkbox is active, the email subject will be marked as spam. |
Header-Tag-Score | Enter a score. If an incoming email reaches this score, the email is marked as spam in the header. (Header X-Spam status and X-Spam level). Recommendation: Value between -999 and 1 |
Spam-Score | Specify a score above which an email should be classified as spam. For emails that reach this score, the header X-Spam flag is inserted. Recommendation: value between 4.5 and 8. The lower the value, the more mails are marked as spam. |
Kill-Score | Enter a number of points above which the action should be performed on spam filters and quarantined, if configured. The Kill Score value must be higher than the Spam Score value. |
Email filter
Whitelist | The email addresses whose mails should never be marked as spam. Catchall (@example.com) is allowed. |
Blacklist | The email addresses whose mails should always be marked as spam. Catchall (@example.com) is allowed. |
| Exclusion List | Email addresses that should not be checked for spam. Certain administrative address must not be checked by spam filters. An example of this are the "hostmaster" addresses, e.g. hostmaster@example.com. The quarantine email address should not be entered here. |
Enter MailProxy server into the zone file
In order for emails addressed to the domain's mail server to be routed to the MailProxy, an MX record for the MailProxy must be entered in the zone file.
Input into the mask:
→ Portfolio → DNS Zones tab → double-click Zone → Resource Records tab → More-Menu → Create New Email Record (MX)
Input as free text entry:
→ Portfolio → DNS Zones tab → double-click Zone → Resource Records tab → More menu → Free text entries.
example.com IN MX 10 mailproxy.domain-robot.org.
If you want to replace the host name of the MailProxy in the zone file with your own, you have to set an MX record and an A record.
MX record: example.com IN MX 10 mail.example.com.A-record: mail.example.com IN A 62.116.162.145.
Optional:CNAME record:
mail.example.com IN CNAME mailproxy.domain-robot.org.
Input into the mask:
Zones & Redirects→ Create Zones → Additional NameserverEntries tab → Click + for a new entry
Input as free text entry:
→ Portfolio → DNS Zones tab → double-click Zone → Resource Records tab → More menu → Free text entries.
example.com IN MX 10 mailproxy.domain-robot.org.
If you want to replace the host name of the MailProxy in the zone file with your own, you have to set an MX record and an A record.
MX record: example.com IN MX 10 mail.example.com.A-record: mail.example.com IN A 62.116.162.145.
Optional:CNAME record:
mail.example.com IN CNAME mailproxy.domain-robot.org.


